

How to Organize a Small Apartment Kitchen: 7 Steps
Last Updated: October 22, 2026
Quick Summary
To organize a small apartment kitchen, clear out clutter first with the four-box method, then measure every shelf before buying any storage container. Use renter-friendly solutions like tension rods, adhesive hooks and freestanding racks, and place daily items at eye level.
- A full apartment kitchen clear-out takes most people two to three hours total.
- Measure shelf width, depth and height, then tape the numbers inside the cabinet door.
- Keep daily items at waist to eye level and heavy pots on bottom shelves.
- Skip adhesive hooks on painted cabinet doors in humid kitchens; use over-the-door hooks instead.
- A 15-minute weekly reset keeps the storage system working.
Table of Contents
- Start With a Clear-Out, Not a Shopping Spree
- Measure First: How to Fit Storage Into an Apartment Kitchen
- Small Kitchen Storage Ideas That Work Without Drilling
- How to Organize Kitchen Cabinets So You Can Actually Reach Things
- Pantry Organization for Small Spaces: Dry Goods Done Right
- Small Kitchen Layout Ideas for Different Apartment Shapes
- Keep It Organized: A 15-Minute Weekly Reset
- Conclusion
- Frequently Asked Questions
Start With a Clear-Out, Not a Shopping Spree
The fastest way to learn how to organize a small apartment kitchen is to remove things before you buy anything. Most people skip this step and end up with more clutter.
Here's the truth most guides get wrong: storage products can't fix a kitchen that's holding three mismatched pan lids and a broken blender. Clear out first. Then measure. Then buy.
The Four-Box Method for Kitchen Clutter
Pull everything out of one cabinet at a time. Sort each item into four boxes:
- Keep, used in the last month
- Donate, good condition, unused
- Relocate, belongs in another room
- Toss, cracked, missing lids, expired
Work one cabinet per evening. A full apartment kitchen clear-out takes most people two to three hours total.
Measure First: How to Fit Storage Into an Apartment Kitchen
Measure every shelf before you buy a single container. Small kitchen storage ideas fail most often because the product doesn't fit the gap.
Grab a tape measure and note three numbers for each shelf:
- Width between the hinges
- Depth from back wall to front edge
- Height from shelf to the one above
Write these on painter's tape and stick it inside the cabinet door. Now you can shop without guessing.
Also measure your tallest cereal box and your biggest pasta bag. A stackable set with several sizes, like the Multipurpose Food Storage Containers Set, lets you match container size to shelf height instead of forcing one size everywhere.

The FDA food storage guidance is worth a quick read on which containers suit dry goods versus leftovers.
Small Kitchen Storage Ideas That Work Without Drilling
Renters can't drill into cabinet sides or walls. The good news: most small kitchen storage ideas work with tension rods, adhesive hooks, and freestanding racks. No deposit at risk.
Vertical Space: Walls, Cabinet Doors, and Cabinet Sides
Use the space you already have:
- Cabinet doors: adhesive hooks for measuring cups and small utensils
- Cabinet sides: magnetic spice tins or a slim tension rod
- Walls: a freestanding leaning shelf, no brackets needed
Under the Sink and Inside Drawers
Under-sink storage is the most wasted zone in an apartment kitchen. A tension rod across the cabinet holds spray bottles by their triggers. A shallow bin keeps sponges and scrubbers together.
For drawers, use adjustable dividers and a cutlery tray. Group by task, not by type: cooking tools in one drawer, eating utensils in another.
How to Organize Kitchen Cabinets So You Can Actually Reach Things
Put the things you use daily at eye level and waist height. This one rule solves most cabinet organization problems. But in a rental apartment, you also have to organize cabinets without drilling shelf pins, adding permanent dividers, or modifying the cabinet in any way the landlord would notice. Here is a step-by-step process that works within those limits.
Step 1: Assign Zones by Reach, Not by Category
A simple zoning plan:
| Zone | Location | What Goes There |
|---|---|---|
| Daily use | Waist to eye level | Plates, mugs, everyday pans |
| Heavy items | Bottom shelves | Pots, bulk dry goods, appliances |
| Rarely used | Top shelves | Holiday dishes, backup supplies |
| Cleaning | Under sink | Sprays, cloths, bin bags |
Keep one shelf free as a landing zone. It stops clutter from piling on the counter.
Step 2: Make the Back of Deep Cabinets Reachable
Deep apartment cabinets swallow items at the back. The renter-friendly fix is a pull-out bin or a two-tier shelf insert that sits on the existing shelf without hardware. If you don't want to buy an insert, use a shallow plastic bin as a drawer: put rarely used items in the bin and slide it out to reach the back.
Step 3: Use the Cabinet Door and Sides Without Drilling
- Cabinet doors: over-the-door hooks hold measuring cups, small utensils, and pot lids. Adhesive hooks work on unpainted metal or glass doors but can fail on painted wood in humid kitchens.
- Cabinet sides: a magnetic spice tin sticks to a metal cabinet side. On wood, use a slim tension rod wedged between the cabinet side and the wall to hang spray bottles by their triggers.
- Inside the cabinet: a tension rod across the width of the cabinet creates a second hanging rail for spray bottles or cleaning brushes.
Step 4: Organize Pots, Pans, and Lids
Stack pots by size with a pan organizer or a simple lid rack. Stand lids upright in a file holder rather than laying them flat. This frees up a surprising amount of drawer space and stops the lid avalanche every time you open the cabinet. For renters, a freestanding pan organizer that sits on the shelf is better than a drilled lid rack because it moves with you.
Step 5: Keep the System Working
Once a month, open each cabinet and check that nothing has crept into the wrong zone. The most common failure is daily items migrating to the top shelf because someone was in a hurry. A two-minute check per cabinet prevents the slow drift back to clutter.
Multipurpose Food Storage Containers Set - Clear Jars with Lids for Cereal →
Pantry Organization for Small Spaces: Dry Goods Done Right
Pantry organization for small spaces starts with decanting.
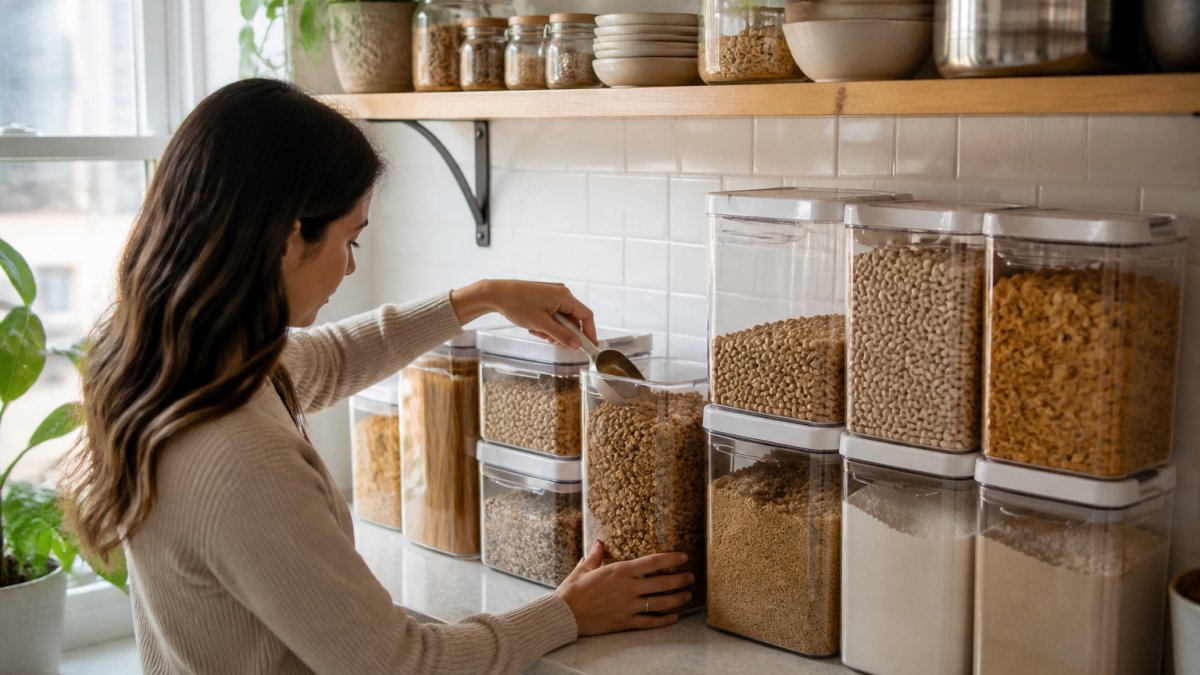
Why bother? Clear containers show levels at a glance, seal-tight lids keep moisture out, and the stackable design uses vertical height instead of spreading across the counter.
A few practical habits:
- Label the lid, not the front, so you can read it from above
- Keep the newest bag behind the oldest container
- Group by use: baking, breakfast, snacks
The USDA food safety guidance recommends keeping dry goods in sealed containers away from heat and moisture, which is exactly what airtight jars do.
Small Kitchen Layout Ideas for Different Apartment Shapes
Small kitchen layout ideas depend on your kitchen's shape, not its size. A galley kitchen and a one-wall kitchen need different storage plans even if they have the same square footage. Below is a tailored plan for each common apartment shape, plus the renter-friendly constraint that applies to all of them: no drilling.
Galley Kitchen (Two Facing Counters)
A galley kitchen has two parallel runs of counter with a walkway between them. The mistake is treating both sides as storage. Instead, split the roles:
- One side is prep: keep the counter clear, put knives on a magnetic strip on the wall (adhesive-backed, no drill), and store cutting boards upright in a slim tension-rod gap.
- The other side is storage: stack pots on the bottom shelf, use the wall above the counter for a leaning shelf or adhesive hooks for utensils, and keep daily dishes at waist-to-eye level.
Measure the walkway width before adding anything. Most apartment galley walkways are narrow enough that a rolling cart will block passage. If your walkway is tight, skip the cart and go vertical instead.
L-Shaped Kitchen
The corner is the dead zone in an L-shaped kitchen. A lazy Susan (turntable) is the standard fix, but a cheaper renter-friendly alternative is a two-tier corner shelf that sits on the counter without hardware.
Use the long leg of the L for prep and the short leg for storage. If the short leg holds the sink, use the cabinet under the sink for cleaning supplies and the wall above for a dish rack that drains into the sink.
One-Wall Kitchen
A one-wall kitchen has no opposing counter, so every storage decision is vertical. The plan:
- Above the counter: open shelves or a leaning shelf for daily dishes and jars.
- Below the counter: drawers for utensils and a pull-out bin for pots if the cabinet allows.
- Wall space beside the counter: adhesive hooks for mugs, a rail for utensils, and a magnetic strip for knives.
Because there is no second counter, keep one section of the single counter permanently clear as a landing zone. A folding dish rack that stows flat when not in use helps here.
Open-Plan Kitchen
An open-plan apartment kitchen shares space with the living area, so storage has to look intentional. A rolling island cart works only if you have floor space to roll it away. If you don't, use a slim console table against the back of a sofa or a freestanding shelving unit as a room divider. Keep the visible side styled and the back side for bulk storage.
The Renter Constraint That Applies to Every Layout
Before you commit to any layout plan, check your lease for rules on adhesive products and wall anchors. Most leases allow removable adhesive hooks but forbid drilling. Test any adhesive hook on an inconspicuous spot first, and remove it with the manufacturer's recommended method (usually dental floss and a hair dryer, not a pry tool).
Keep It Organized: A 15-Minute Weekly Reset
A 15-minute weekly reset keeps the system working. Pick one day, set a timer, and run through this checklist:
- Return stray items to their zones
- Wipe container lids and check seals
- Refill low dry goods from backup bags
Shared kitchens need one extra rule: label your shelf and keep communal items in one agreed bin. It prevents the slow creep of other people's mugs onto your counter.
Conclusion
Small apartment kitchens don't need more stuff. They need a clear-out, honest measurements, and storage that fits the space you actually have. Start with the four-box method this weekend, measure your shelves, and add containers only where they earn their spot.
DecorGlore's stackable, BPA-free storage containers with airtight seals are built for exactly this: clear jars that show what you have, save cabinet space, and keep dry goods fresh. Shop the Multipurpose Food Storage Containers Set and turn your apartment kitchen into a space that works with you.
Frequently Asked Questions
What are common mistakes to avoid in a small kitchen?
The biggest mistake is buying organizers before decluttering and measuring. People buy stackable bins that don't fit their cabinets, then end up with more clutter than before. Second is storing rarely used items at eye level while everyday dishes sit on a high shelf. Third is ignoring vertical space: cabinet doors, cabinet sides, and wall racks often go unused. Finally, skip open shelves crammed with mismatched packaging. Decant dry goods into clear containers so you can see what you have and stop buying duplicates.
How can I add storage to a small apartment kitchen without remodeling?
Renter-friendly options do the work: over-the-door racks, tension rods under the sink, adhesive hooks on cabinet sides, freestanding shelving units, and stackable containers. None require drilling, so you get your deposit back. Start by measuring the gap between your counter and upper cabinets, then add a freestanding shelf or a wall rack there. Inside cabinets, stackable clear jars with seal-tight lids let you use the full height of a shelf instead of wasting the air above short boxes.
How should I organize kitchen cabinets in a small apartment?
Work by zone, not by category. Put plates, glasses, and cutlery within arm's reach of the sink and dishwasher. Keep pots and pans near the stove, with lids on a rack or nested inside. Reserve the highest shelves for seasonal or bulk items, and the lowest for heavy pots. Add a riser or stackable containers so you can see the back of each shelf. A quick rule: if you use it daily, it belongs between hip and eye level.
What is the best way to make a small kitchen feel less cluttered?
Clear the counter almost completely, then put back only what you use daily. Decant dry goods into matching clear containers so shelves look uniform instead of a patchwork of boxes and bags. Keep one small tray for oils and utensils rather than scattering them. Light colors and clear materials help a compact layout feel larger. A 15-minute weekly reset, where everything returns to its zone, keeps it that way without a big clean-out every month.